How To Make Perfect Gnocchi ~ Italian Dumplings ~ GIVEAWAY!
Who doesn’t LOVE gnocchi? And absolutely nothing that you buy pre-packaged can ever beat HOMEMADE! And gnocchi is SO EASY to make. Here I’ll teach you how to make perfect gnocchi from your very first try! Yup, it’s that easy!
What is Gnocchi?
Gnocchi (pronounced nyoh-kee) means ‘little lumps’ in Italian. In Italian cuisine, these little lumps are simply little pieces of dough. Gnocchi dough is traditionally made from either potatoes (recipe given here), semolina flour, or ricotta cheese. It’s more common to prepare gnocchi with cooked potatoes, flour, eggs, and sometimes with cheese added.
Is Gnocchi Pasta?
Gnocchi is NOT pasta since they are mostly made from potatoes, and pasta is made mostly with flour and no potatoes.
But before we get into making this wonderful gnocchi recipe, I have to fulfill a promise that I made to you in December 2024 when I retired from teaching marketing at the University of South Carolina.
I promised you that I would now have the time to GIVE YOU more freebies: more free e-books, more free giveaways, more videos to help teach you culinary skills that you wish to learn . . . etc. etc. etc.
So, as promised in my last newsletter, this year will be FILLED with fantastic giveaways that you’re going to want to enter to win great foodie and travel gifts . . . from me, cuz I love ya!
My first awesome 2025 giveaway includes . . .
- a potato ricer (a MUST to make homemade gnocchi)
- a gnocchi board
- a “nonna knife” (you’ll never need another utility knife)
- a bench scraper
- a ‘spider’ strainer/skimmer
- a CD of Italian music
- PLUS, a “La Bella Vita Cucina” apron!
Wow! This is valued at $135 and worth so much more in sheer happiness in the kitchen!
You can find the Giveaway at the bottom of this post! The Giveaway has ended. The winner is Mary R.! Congratulations!
Now, of course, I’ve got a recipe for you. Can’t have a blog post without a delicious recipe, right?
We’re going to make perfect gnocchi with a very amateur video to show you how to do this! Please forgive me as I am learning a new thing at my age. I can cook, bake, raise children, have a hell of a great time with grandchildren, and teach marketing classes . . . but this ol’ gal is totally new at making videos!
OK, so first things first, my friends….. you have to have the equipment to make perfect gnocchi.
You MUST have:
- potato ricer
- large wooden cutting board (or a floured countertop surface will also work)
- utility knife
- bench scraper
- gnocchi paddle board
- fork
- large, deep 12-quart stockpot (to boil the gnocchi)
- large spider strainer/skimmer or ladle with holes
- baking sheet pans with parchment paper
Bella Tip: What the heck is a Potato Ricer? Well, is an extremely handy kitchen tool that you place potatoes inside and push them out of a plate with lots of small holes. A ricer helps prevent grated potatoes from becoming lumpy. A smooth, lump-free texture is ‘perfetto’ for making light, fluffy gnocchi. You can even use it to make mashed potatoes
a potato ricer gadget! No kidding, this is a must!

a wooden gnocchi board

a good bench scraper

an authentic ‘Nonna Knife‘

a “spider” strainer

Now that we’ve got all of those gadgets, it’s time for us to:
Andiamo a cucina (Let’s go to the kitchen) !!
So let’s gather up all of the ingredients that you’ll need to make gnocchi:
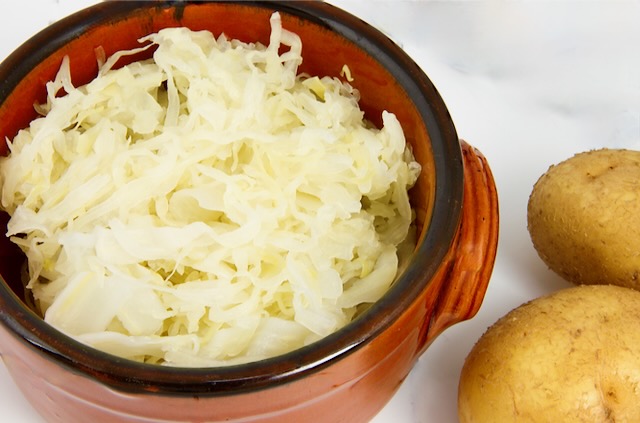
- russet potatoes (some people use Yukons, but they’re too waxy for me)
- “00” type flour (a soft, fine-milled flour from Italy. It’s a must-have for light and tender gnocchi and pasta).hi
- egg(s)
- fine ground sea salt
- ground nutmeg
How to Make Homemade Potato Gnocchi {Step-by-Step}
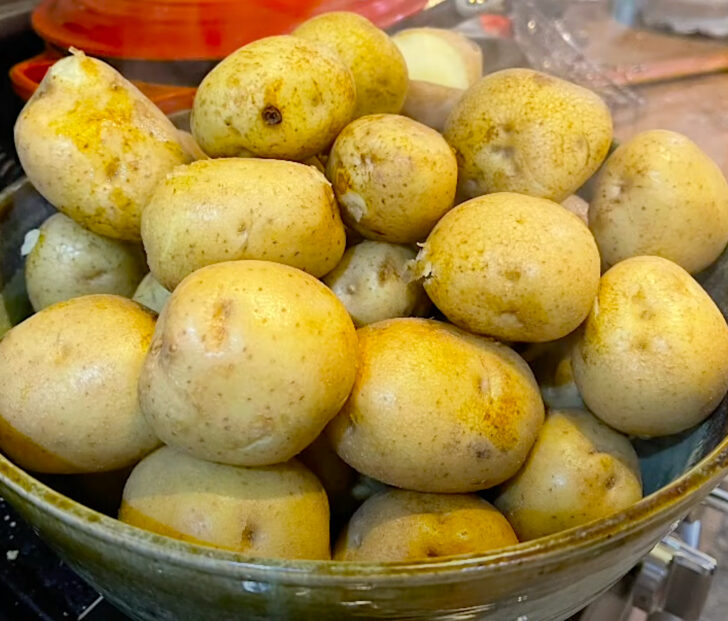
Step #1: Prepare The Potatoes
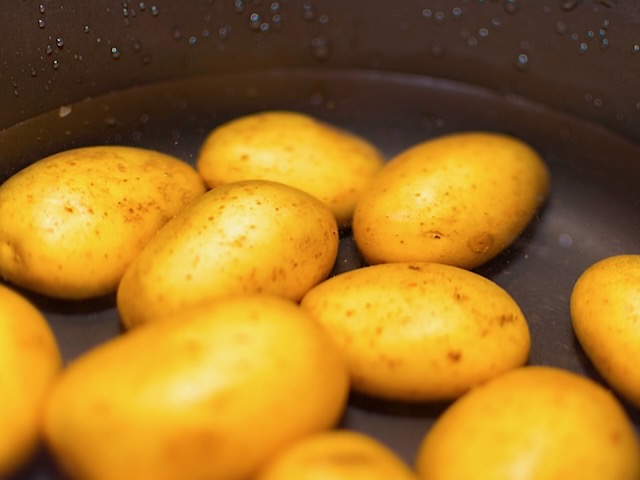
- Boil the potatoes with the skin on until tender for about 30 minutes (piercing into a potato with a fork will help indicate if the potatoes are soft in the center or still hard). Drain and allow to completely dry.
- When boiling the potatoes, ou can either place the potatoes in cold water and bring the water up to a boil . . . or you can boil the water first and then place the potatoes in the already piping hot water. It’s up to you. I boil potatoes with the skin on because the peel/skin keeps in the minimal amount of flavor in potatoes. I also boil them as whole potatoes, but some people cut them in 1/2s or 1/3rds to cook them faster.
- Lastly, some people bake the potatoes for about an hour at 350 F degrees instead of boiling them. Place the potatoes directly on the middle rack of your oven (don’t set them on a baking pan in order to prevent uneven baking). But as a traditionalist, I use the boiling method.
Boil potatoes
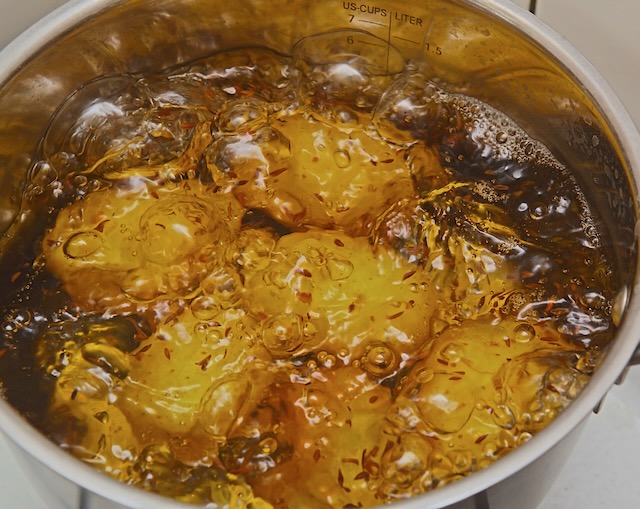
Bring water back up to a rolling boil. Boil until soft: when a fork is inserted into a potato, it is soft in the center and not hard.
Using a ‘spider’ strainer, remove the potatoes and tap a few times on the pan to decrease the water on the potatoes.
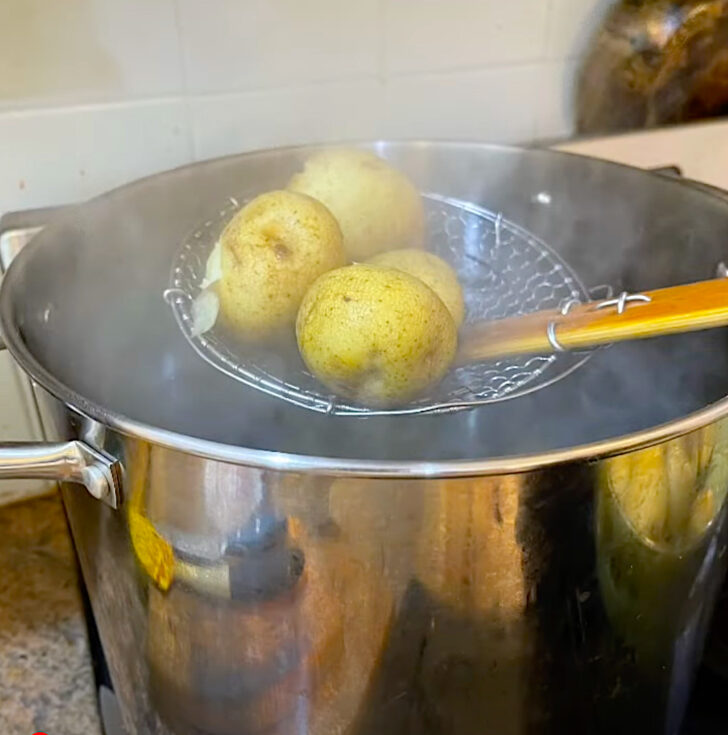
You can also use a clean dish towel to tap-dry the potatoes.
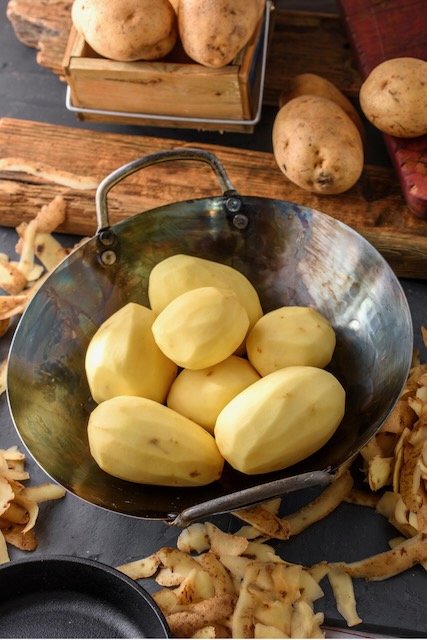
when cooled a bit, enough to be able to hold and handle but still warm, peel the potatoes (with either a knife or ‘peeler’). Some people ‘scoop’ the potato flesh out of the skin jackets. Either method is fine.
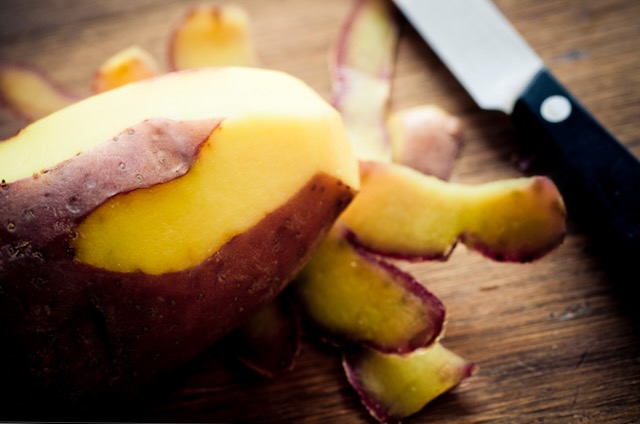
peel the potatoes
using the potato ricer, press the warm potatoes through and into a large bowl; it’s easier to ‘press’ the potatoes through with potatoes cut in either half or in thirds and still warm.
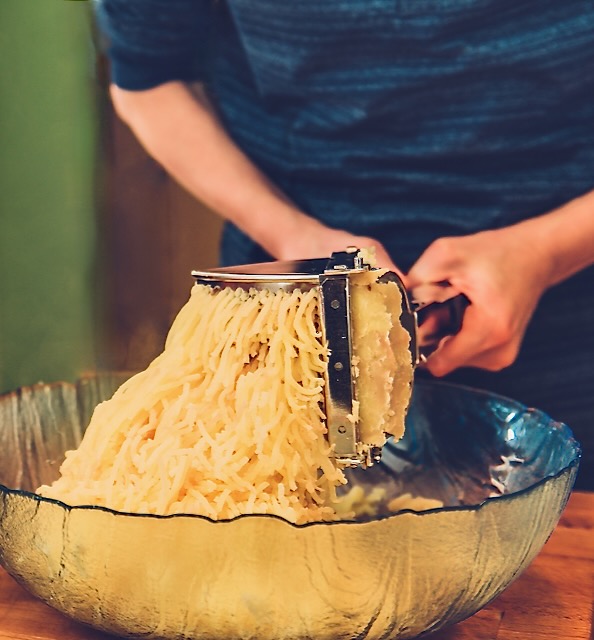
the potatoes will look ‘shredded,’ and NOT mashed
Step #2: Prepare the Dough
First, add the flour and a little bit of grated nutmeg to the potatoes
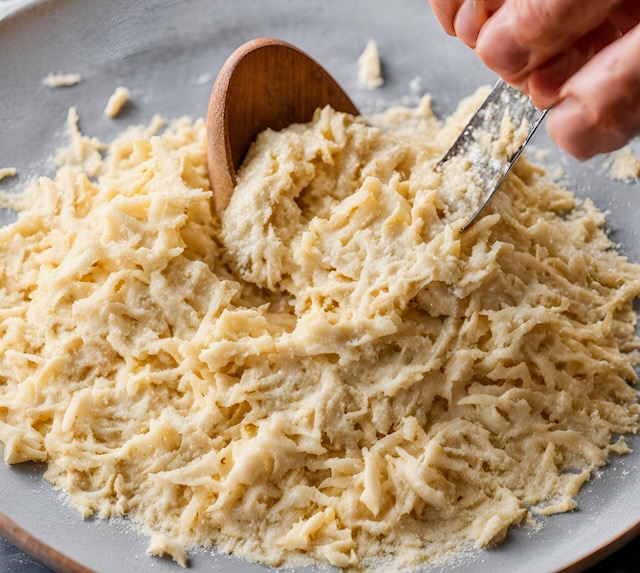
and mix together well
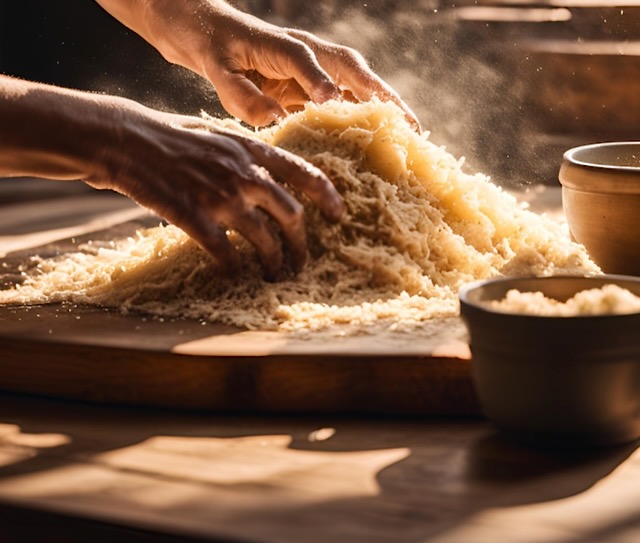
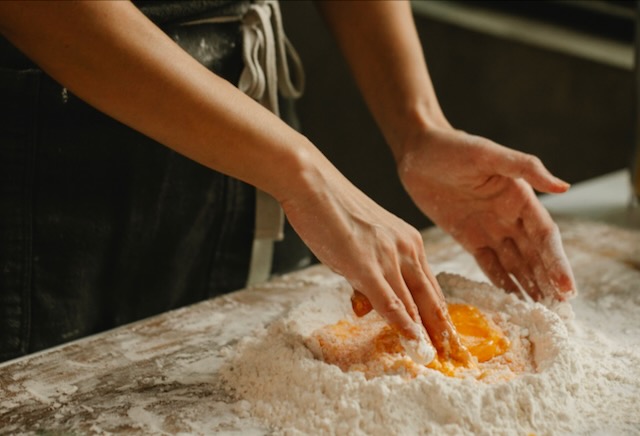
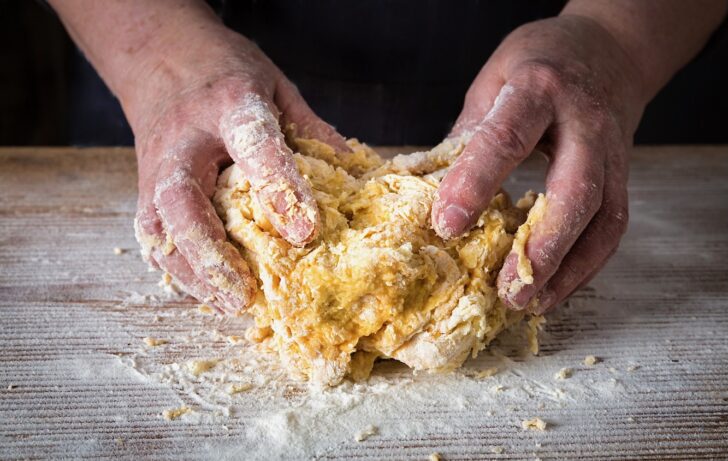
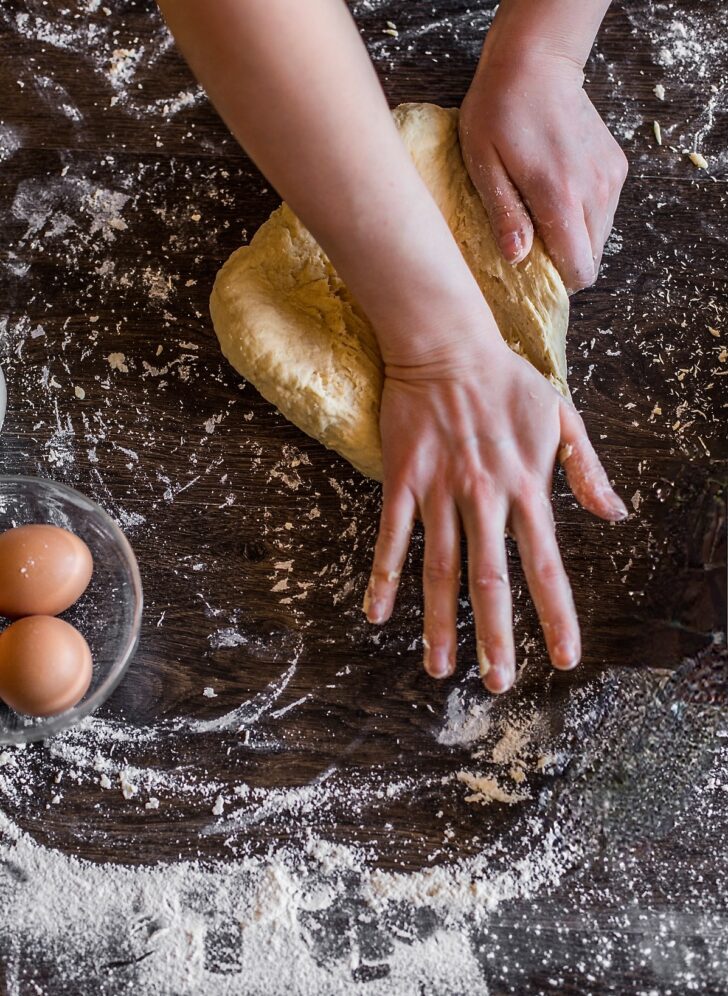
this is the traditional Italian way to make dough, which I recommend: use your hands to form a ‘well’ in the center of a mound of the potato/flour mixture
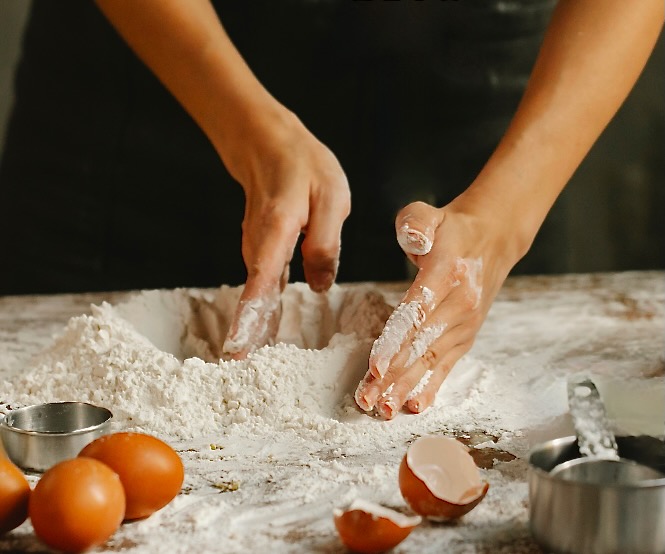
crack the egg(s) and pour into the ‘well’
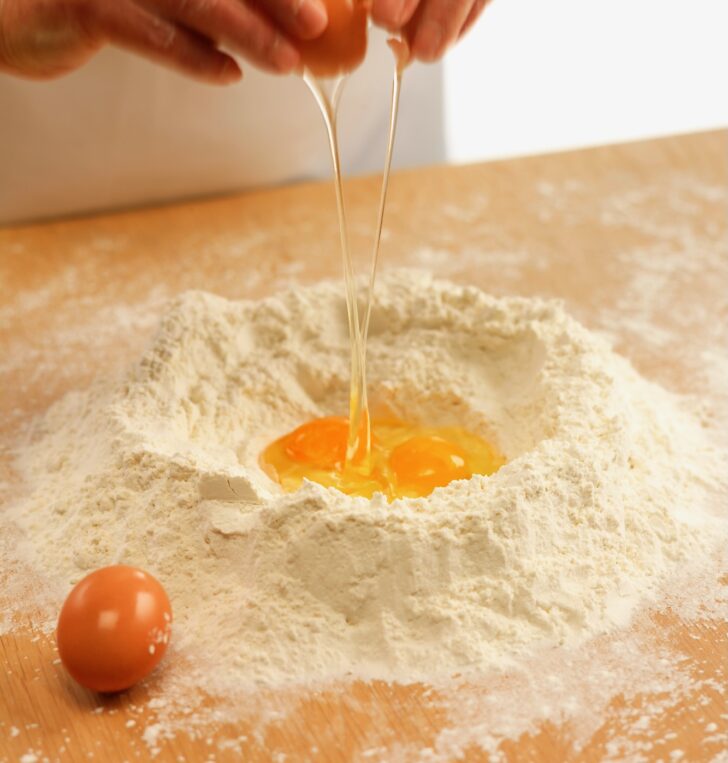
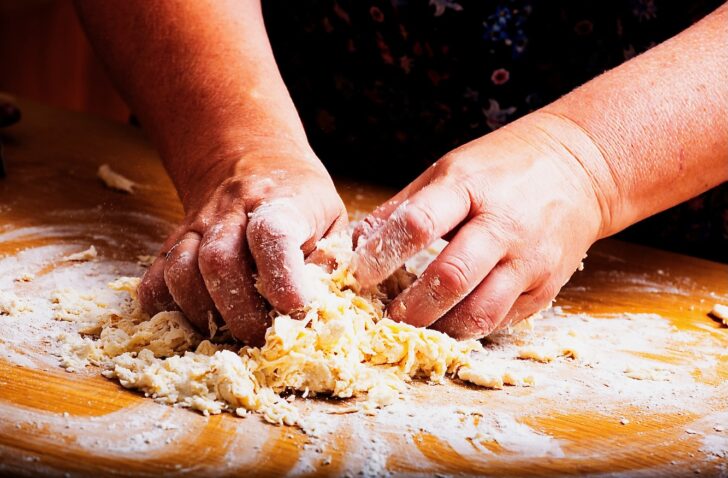
Using your hands (or a fork), begin to pull the potato/flour mixture toward the center of the ‘well’ and gently mix it in with the egg.
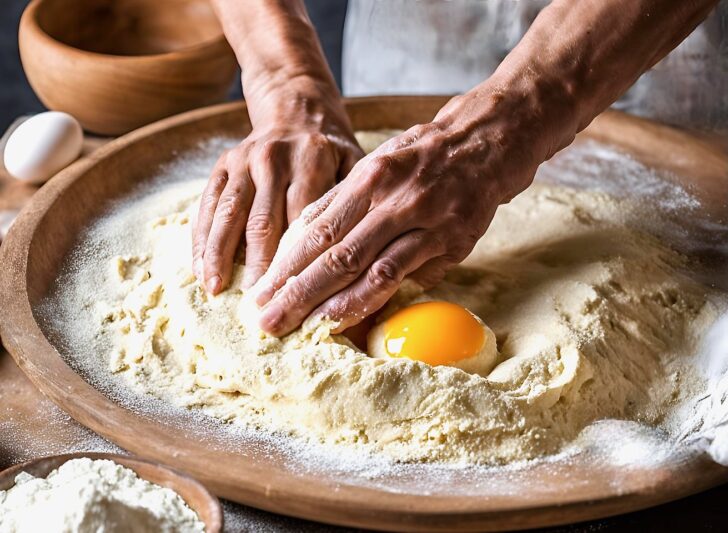
Continue to go around the ‘well’ gradually pulling the potato/flour mixture into the egg(s), using your hands . . .
or using a fork (either way, your hands will get messy)
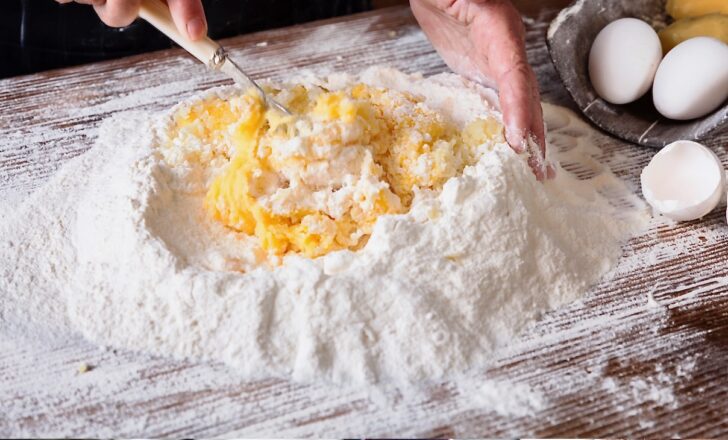
continue mixing with a ‘bench scraper’
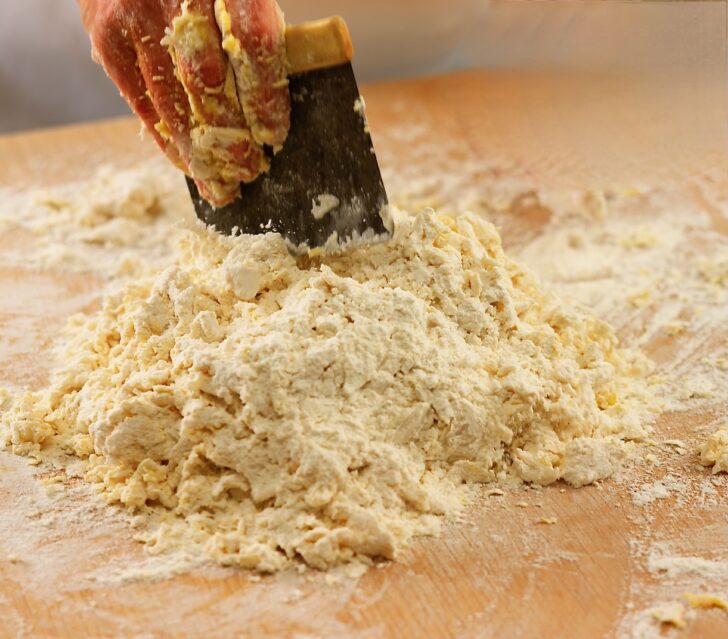
then once the dough starts to stick together (but is not yet a ball), you’ll finish by using your hands, thoroughly mixing everything together
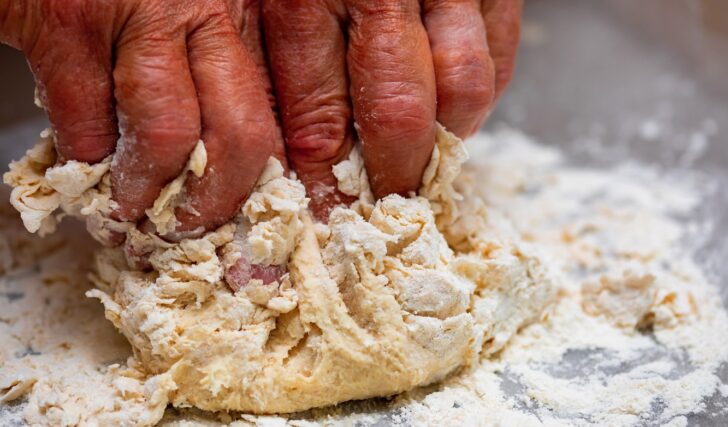
begin to (very gently) form a ball
at this point, do not knead the dough, which activates gluten. Plus, too much kneading causes gnocchi to have a less desirable chewy texture.
if your dough is too dry (from too much flour), drizzle a tiny bit of water on top and knead it into the dough.
and if your dough is too wet, sprinkle a little bit of flour on the dough and ever-so-slightly knead it into the dough
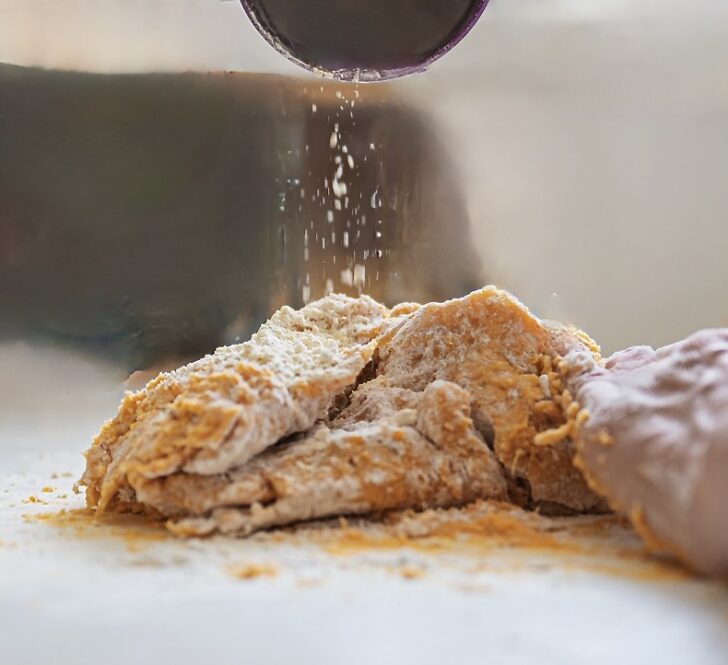
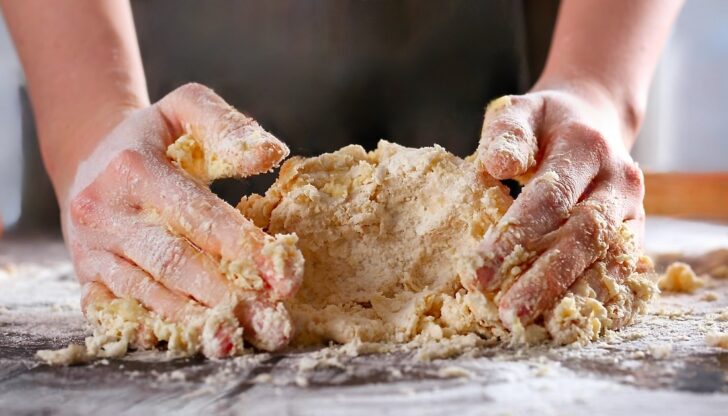
GENTLY knead the dough . . . but don’t overdo this
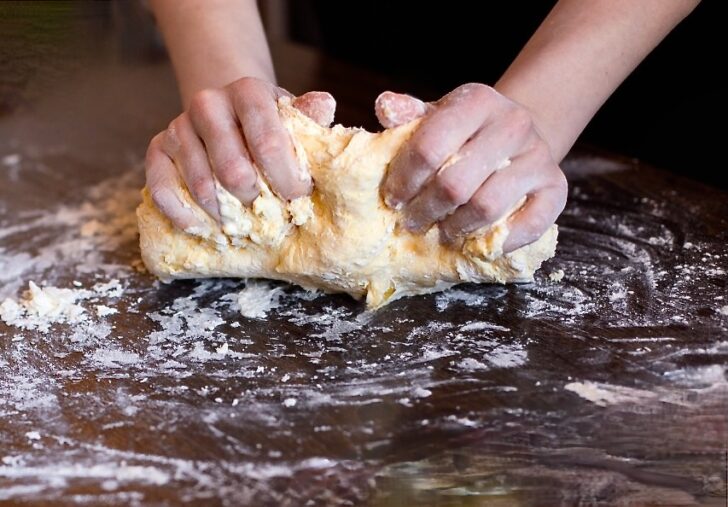
when you knead the dough (gently), use the base of your hand to press down and then forward
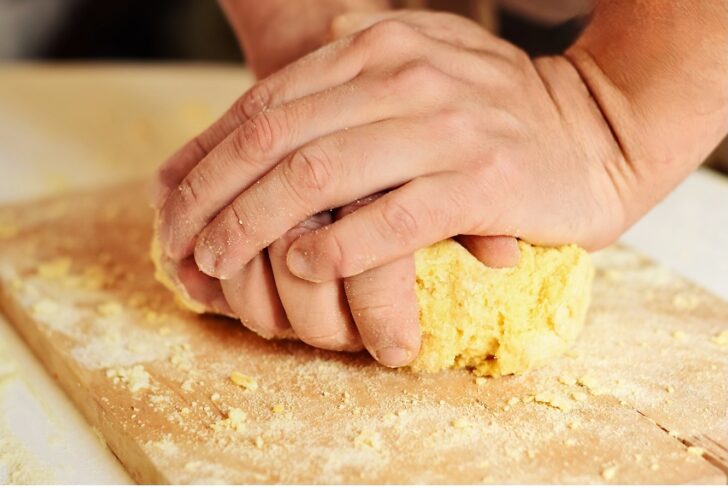
the dough forms very quickly, so don’t over-knead

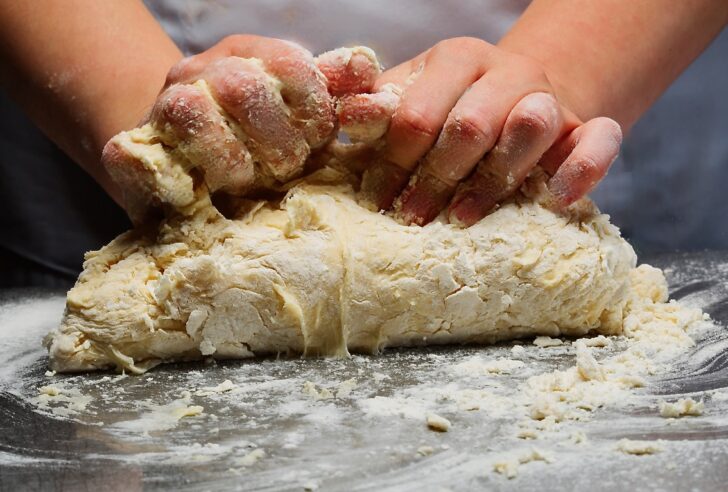
your ball of dough might look a little lumpy at first, but
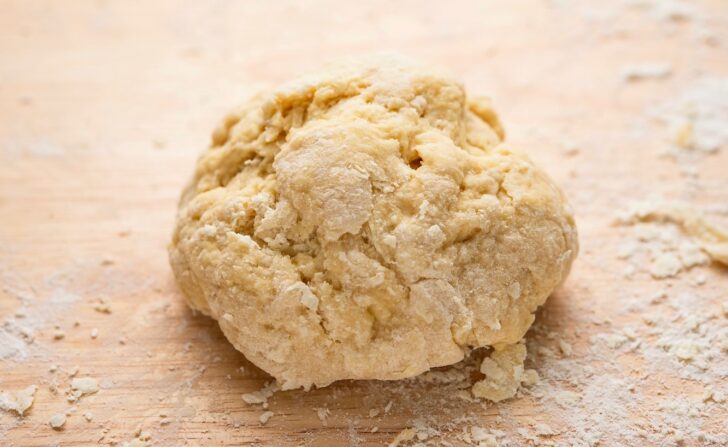
just gently form the dough together, and you’ll have a beautiful dough ball. No need to ‘work’ the dough.
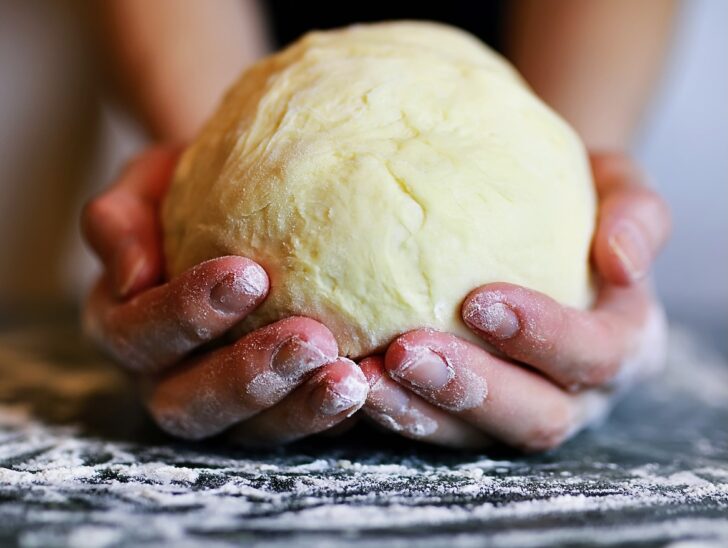
it should have a very soft, smooth, and tender texture to the touch and spring back when you press your finger into the dough and hold the imprint of your finger.
The gnocchi dough should feel warm, light, and fluffy.
Cover and let rest for 10 minutes.
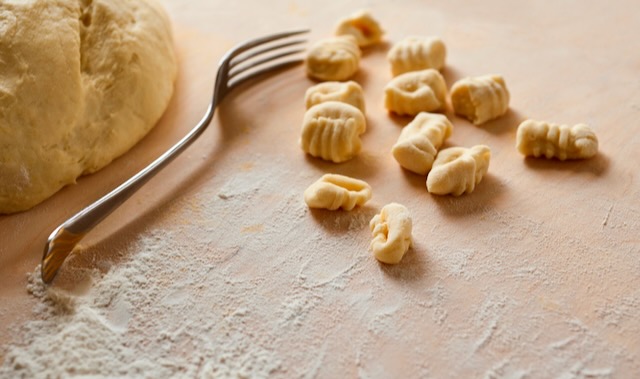
Step #3: Make the Gnocchi Dumplings
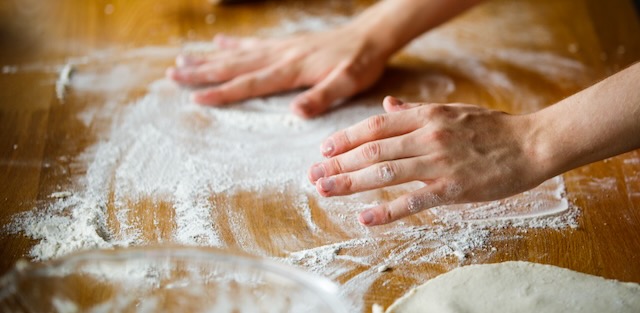
- First, lightly dust your wooden board or work surface with flour. Cut the dough ball into smaller equal-sized pieces/chunks. Cover each with plastic cling wrap.
- Take one piece/chunk of dough, and with your fingers, begin to roll and stretch it into one long rope-like piece of dough, about 12″ long and about ½” in diameter. Cut the rope into 1/2″ squares that look like tiny pillows! Then roll each square into a little ball shape.
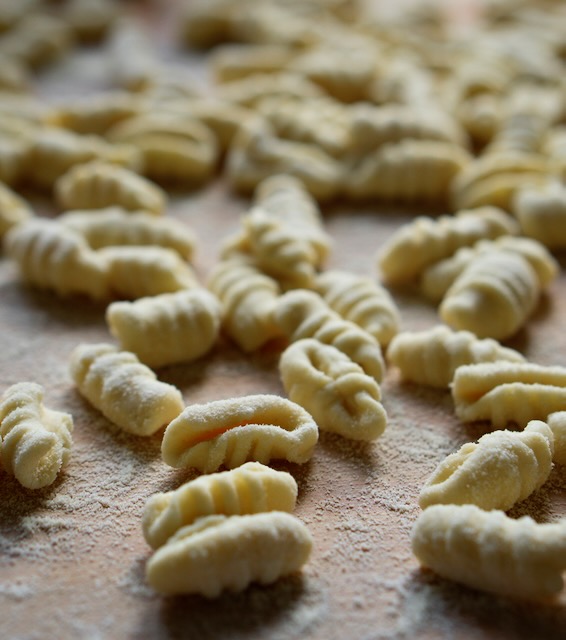
- Gently press each piece onto your gnocchi paddle board that you have placed on an angle. As you press down, roll the piece of dough down and off of the board. This creates nice ridges in the gnocchi. Place the gnocchi on baking sheets lined with parchment paper. I also dust a little flour on the gnocchi at this time.
When your dough is ready to cut into gnocchi, lightly flour a wooden board or cooking surface
cut the ball of dough into 1/4th’s and cover each with plastic cling wrap to prevent it from drying out
now take a chunk of the dough and ever so gently, roll it out into a ½” thick ‘rope’ of dough on a floured surface
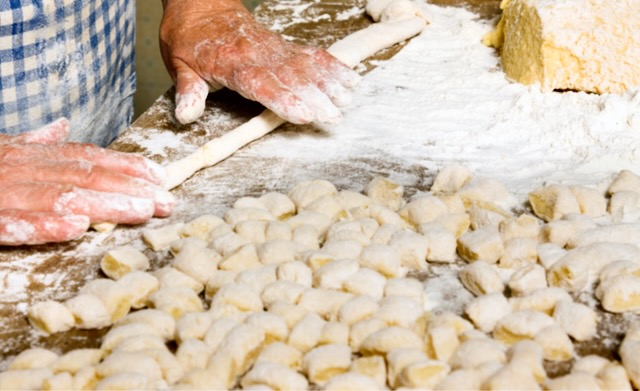
this is demonstrated in the video
using a utility knife (or a ‘nonna’ knife), cut each ‘rope’ of dough into ½” pieces
scatter the cut gnocchi pieces all over a floured board or surface
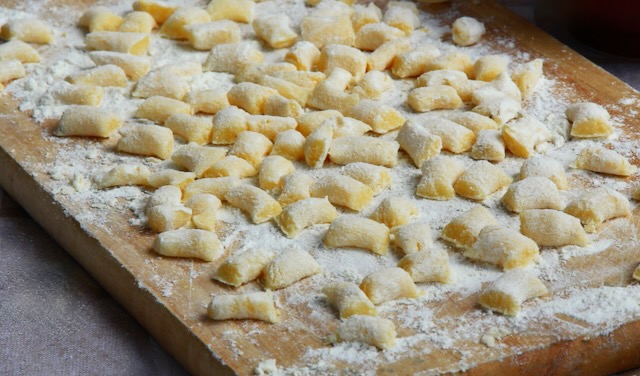
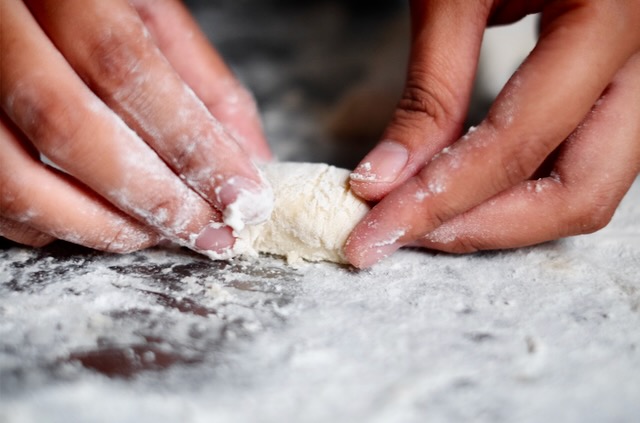
with either a gnocchi paddle board placed at a slight angle, gently press each gnocchi dumpling ‘down’ into the board with your finger. Then, in one forward motion of your finger, roll it down and off the board to form a ridge. Repeat with the rest of the gnocchi.
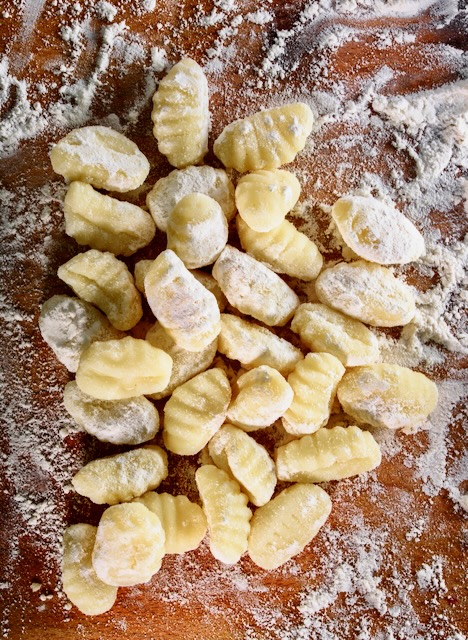
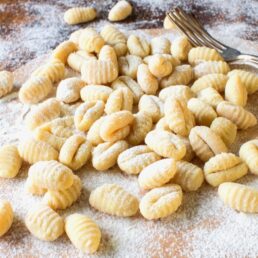
your gnocchi should be light and fluffy and should be a beautiful, light, pale yellow color.
Step #4: Cook the Gnocchi
Bring a tall pot of water to a rolling boil that has been generously salted with ground sea salt (which works best to bring out the flavor of the gnocchi). Carefully place a small amount of gnocchi into the hot water. Boil for 1 minute. They are ready to serve when they float to the top of the water. Using a spider strainer, carefully remove a few of the delicate dumplings at a time. Place them directly in a serving dish and add them to the sauce that you will serve with the gnocchi. Don’t let them set out. Make sure that whatever sauce you serve is hot and ready for the hot gnocchi dumplings.
They have a tendency to become sticky if held longer than that; make sure your sheet pan is well-dusted in semolina flour. Cover with an inverted sheet pan or a clean kitchen towel. Alternatively, cover it with plastic wrap and chill it for a few hours.
When you cook frozen gnocchi, simply place them in boiling, salted water without having to thaw them out first. Just add fewer frozen dumplings to the hot pot so that the water’s temperature doesn’t drop and cool down too much, and they’ll sink to the bottom of the pot and clump together in a mass of gummy dough.
Ridges: To Have or Not To Have
Whether using a gnocchi board or a fork, many people prefer to have ‘ridges’ in gnocchi. Why? Ridges add a nice texture that holds the sauce that you add. It’s like potato chips with or without ridges or even pasta shapes that have or don’t have ridges. Personally, I prefer the ridges, but it takes practice to make gnocchi pretty with ridges.
Secondly, should you use a gnocchi board or a fork? Again, it’s a matter of personal preference. I like to use the gnocchi board, and find it easier to use than a fork.
Bella Tip: To Use Eggs or Not
For me, personally, I follow my family’s traditions not only in recipes but also in methods of preparation. My family recipe includes eggs . . . the whole egg and not just the yolk. Some people eliminate eggs altogether. It comes down to personal preference, as usual.
We use eggs in gnocchi because eggs are like glue, holding the dough together. Without eggs as binders in the dough, you seriously run the risk of your gnocchi dumplings falling apart when they are boiling. After all the work making these little beauties, how sad it would be to see them just disintegrate in front of you (and maybe your guests)!
How To Store Gnocchi
If you’re not going to serve gnocchi immediately, you can place them on a baking sheet lined with parchment paper. I give them a good dusting of flour at this time as well. Gnocchi can be stored in a refrigerator for up 2 days in zip-loc plastic freezer bags or any airtight containert.
How To Freeze Gnocchi
Place the gnocchi in a single layer on a baking sheet pan lined with parchment paper (and, if you want, with a little dusting of flour on the parchment paper). Freeze on this baking sheet. Then, remove the gnocchi and put them in an airtight container or freezer bag. They should not stick together by freezing them flat before putting them in a freezer container. Gnocchi can be frozen for up to 6 months. When ready to use, you don’t need to thaw them out . . . just cook them as is, frozen.
DON’T FORGET!
The Giveaway is at the bottom of this post!!! I’m sending positive vibes for one lucky, lucky winner! The Giveaway has ended. The winner is Mary R.! Congratulations!
I hope that you will enjoy this video of one of my cooking classes. This class focused on preparing gnocchi in two (2) sauces (pomodoro and a lemon-cream parma sauce). Please scroll down for the recipe.
Scroll down to get the EXACT recipe and tips in this brochure for you!
Gnocchi ~ Italian Dumplings
Description
Here is the classic recipe for authentic Italian potato gnocchi. It’s so easy that once you follow this recipe and process, you’ll never buy store-bought gnocchi ever again. BUON APPETITO!
Ingredients
-
- 2-1/4 lb. medium-size Idaho Russet potatoes
-
- Ground sea salt
-
- 3-1/2 oz. of “00” flour
- 2 egg yolks (from large/jumbo eggs)
- several pinches of freshly-grated nutmeg
Instructions
- Place the potatoes in boiling water (or in cold water and bring to a boil)
- Boil for 20 – 30 minutes or until fork tender (soft in the center).
- While warm (not hot) peel the potatoes.
- With a potato ricer, squeeze each skinned, warm potatoes through the bottom with holes.
- Spread the potato shreds out about the size of a dinner plate on a wooden board or surface. Don’t handle them too much.
- Sprinkle the flour all over the shredded potatoes.
- Sprinkle coarse sea salt all over the pile of potatoes.
- Sprinkle with a pinch of freshly-grated nutmeg.
- Make a ‘well’ in the center of the potatoes.
- Crack the egg yolks into a small bowl and with your fingers, separate the egg whites from the yolks. Place the yolks inside the potato ‘well’.
- With a fork, begin to blend, working in a circle to continually incorporate the potato/flour mixture with the yolks.
- With clean hands, mix everything together with your hands. Don’t overdo it.
- Take some flour and lightly flour the board or surface.
- Roll the dough into a ball. Again, don’t overdo it.
- Place the ball of dough in a bowl and cover it with a light towel or cover it with plastic cling wrap. Allow to rest for 10 – 30 minutes.
- Enjoy a nice glass of wine!
- After it rests, cut off a nice, 2″ slice/chunk of dough, such as a thick piece of toast.
- On a wooden cutting board that you’ve slightly dusted with flour, gently roll the slice of dough into a long tube or rope until about ½” in thickness and about 12- 20″ in length.
- Cut the tube/rope of dough in half. Lay side by side.
- Take a bench scraper or sharp knife and cut of ½” pieces (pillow shaped dumplings), trying to cut the same shape and size for all of the gnocchi.
- Roll each into little balls which are easier to shape on the gnocchi board, but it’s not mandatory to shape into balls.
- Place each gnocchi pillow/dumpling on a baking sheet cover with either a thin towel or parchment paper, lightly floured to prevent sticking.
- Take each gnocchi and shape it on the gnocchi board (or fork) by gently pushing down onto the board (or fork) and then rolling it down and off the board (or fork) (see my video on youTube).
- Boil them right away for 1 minute. They will float to the top of the water when done.
- Place them in a serving dish with the hot and ready sauce of your choice.
- Garnish with freshly grated parmesan cheese if desired.
- Garnish with minced Italian parsley or basil.
- OR refrigerate for 2 days OR freeze for up to 6 months.
Buon Appetito!
~ Roz xoxo
Thank you to everyone who entered my first giveaway of 2025! The Giveaway has ended. The lucky winner is Mary R.! Congratulations! I’ll contact you for your shipping address to send this huge bundle of gnocchi goodies to you!
Stay tuned for the February giveaway . . . another HUGE bundle of wonderful kitchen/culinary goodies!
Liked video and subscribed to channel.
I liked the gnocchi video… the first couple of times. But having to play a five minute video DAILY for sweepstakes entries, AND having to watch the 24-hour clock to see if I could even enter the sweepstakes, was a real pain. It was worth it for the sweepstakes prizes though! Looking forward to more!
I liked this video on YT. We love gnocchi!
Joined your Facebook group- Ashley Mains
Liked the gnocchi video!
I subscribed on you tube!
Never had them or never made them but I enjoy watching your video’s. You make everything looks so easy.
You are a Great Inspiration to us all!!
Thank You
Colleen,
Prego! It’s my complete pleasure to teach others how to prepare Italian dishes. Especially when they appreciate it, such as you have done.
Ciao,
Roz
I clicked on to join your Facebook groups and it just clicked for an entry. Where to join at? I have been looking?
Hi Faye,
There should be a ‘follow’ button at the top of the group page (but underneath the main photo. Please let me know if you found it or not.
Thanks,
Roz
Cannot find where to enter for the giveaway.
Hi Dot,
The company that created the raffle form fixed it this morning and it is now functioning.
I apologize for the glitch caused by the raffle form company.
Ciao,
Roz
No Giveaway Found
Hi Karen,
I apologize for all of the headache this malfunctioning form may have caused you.
The raffle form company fixed it this morning and it is now functioning correctly.
I hope you will try again.
Ciao,
Roz
love to enter the giveaway where is it?
Hi Laurie,
First of all, I’m so sorry for the error in this giveaway form. The company that created it went in and fixed it this morning.
So it is working now. I hope you return to enter the giveaway.
Ciao,
Roz
There’s no place to enter. It says “no giveaway found”
HI Audra,
I apologize for the raffle form not appearing; the company that developed it went in and fixed the problem this morning and it is functioning properly.
Thank you for your patience and I hope that you enter the giveaway,
Ciao,
Roz
Enjoy a glass of vino! Love it! This is definitely one recipe I am going to try! Thanks for sharing and for the giveaway! 💕
Where is the giveaway?
I can’t find the contest link, there is nothing at the end of the recipe on this page
Hi Giovanna,
It appears to be working now. Please me know. I’m so sorry for this glitch.
Ciao,
Roz
I have never made these homemade, only store bought.
Outstanding
Hi,i cannot enter your giveaway??
Hi Cindy,
Oh my gosh! Thank you for telling me ! I’m so sorry for this inconvenience! I’ve emailed the company that I’m paying for this service. Although they are closed on the weekend, the owner wrote back to me and said they’d work on it. I don’t know what’s going on since it works on my computer using Chrome, but it doesn’t appear/work on my husband’s computer.
I’ll get to the bottom of this as fast as the company (RafflePress) gets back to me.
I am so very sorry!
Roz
I COUDN’T FIND A PLACE TO ENTER THIS CONTEST.
Hi Darlene,
Thank you for telling me. . . I’m so sorry for this inconvenience! I’ve emailed the company that I’m paying for this service. They are closed on the weekend, I don’t know what’s going on since it works on my computer using Chrome, but it doesn’t appear/work on my husband’s computer.
I’ll get to the bottom of this as fast as the company (RafflePress) gets back to me.
I will re-run this giveaway on Monday once they fix the problem or I’ll use another raffle service and get it up and running.
I am so very sorry!
Roz
This looks like an amazing recipe! I cannot wait to try it!
where’s the giveaway?
Hi Michael,
Oh my gosh, this situation is just a nightmare. I’m so sorry for this inconvenience! I’ve emailed the company that I’m paying for this service. They are closed on the weekend, I don’t know what’s going on since it works on my computer using Chrome, but it doesn’t appear/work on my husband’s computer.
I’ll get to the bottom of this as fast as the company (RafflePress) gets back to me.
I will re-run this giveaway on Monday once they fix the problem or I’ll use another raffle service and get it up and running.
I am so very sorry!
Roz
Great tutorial Roz and it inspires me to make some.
They look so much better than those I saw in stores and bet they are just as delicious if you enjoy pasta.