Heirloom Tomato and Italian Cheese Tart
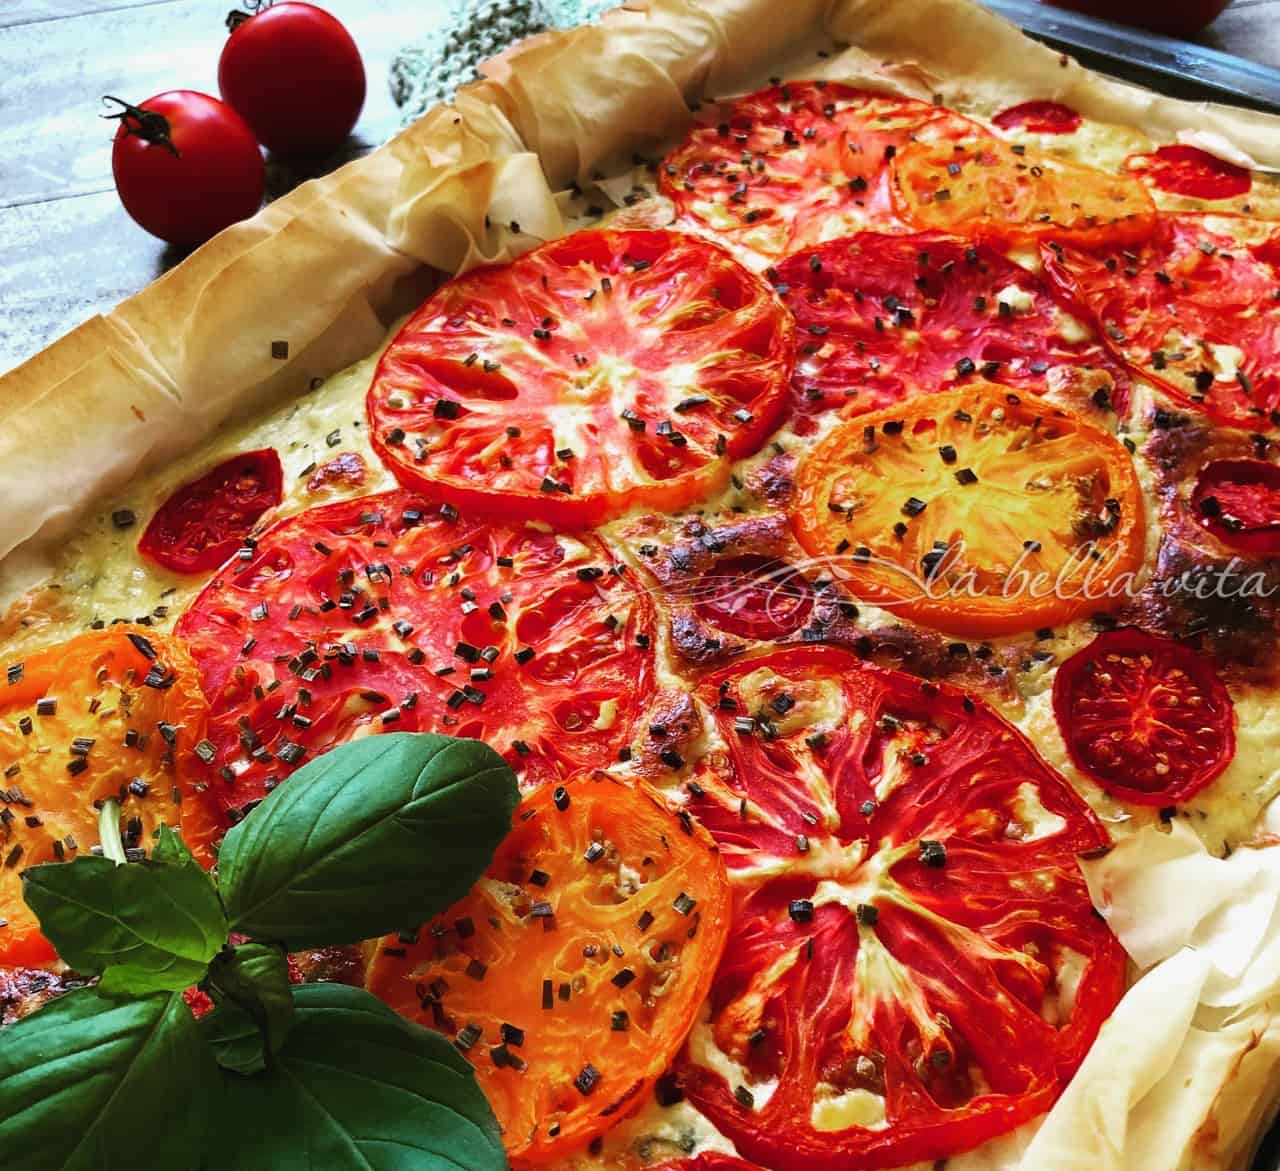
Here’s an AMAZINGLY delicious (and I seriously mean that) way to celebrate the freshness and flavor of the summer’s bounty: An Heirloom Tomato and Italian Cheese Tart! Layers of phyllo dough sprinkled with goat cheese crumbles and olive oil throughout the layers give a subtle tang to the pastry. The result is a flaky, cheesy crust that’s slathered with a creamy Italian cheese and herb blend. Beautiful sliced heirloom tomatoes sprinkled with chives top everything off in this stunning tart.

This Heirloom Tomato and Italian Cheese Tart can be served cold or warm.
Slices of the tart can be taken on a picnic, served elegantly at a special occasion, or served at a nice luncheon or brunch.
As for me, I’ll nibble on this for an afternoon snack!
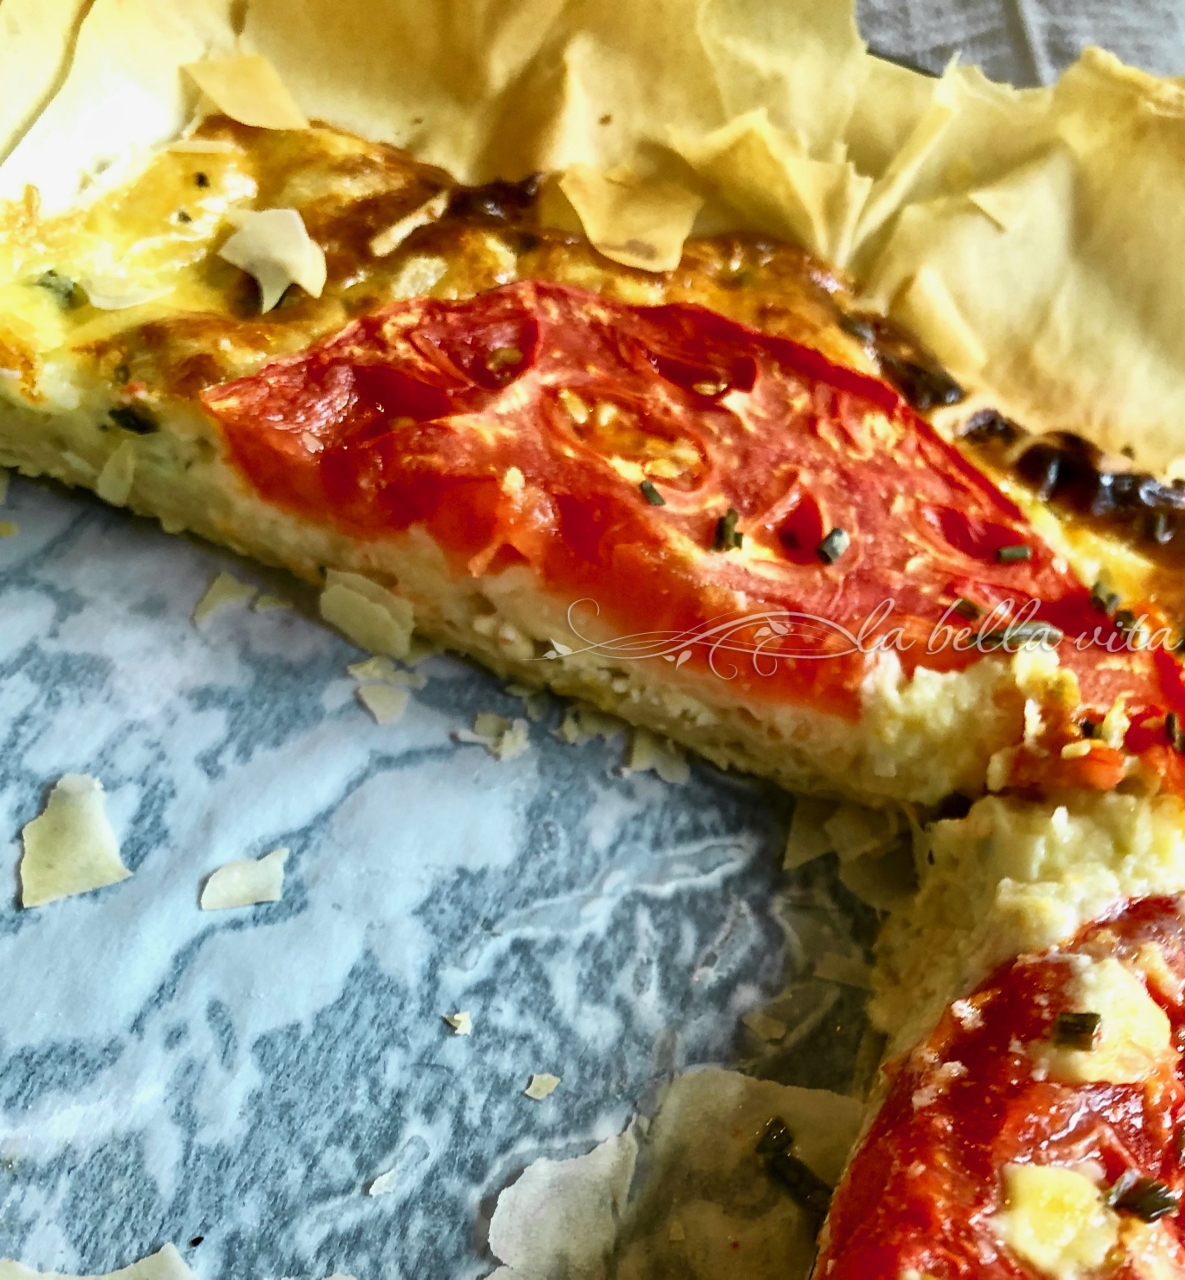
Above, you can see that when you slice into the tart, there are layers of phyllo and goat cheese!
The cheese isn’t just in the filling with the tomatoes. Yum!
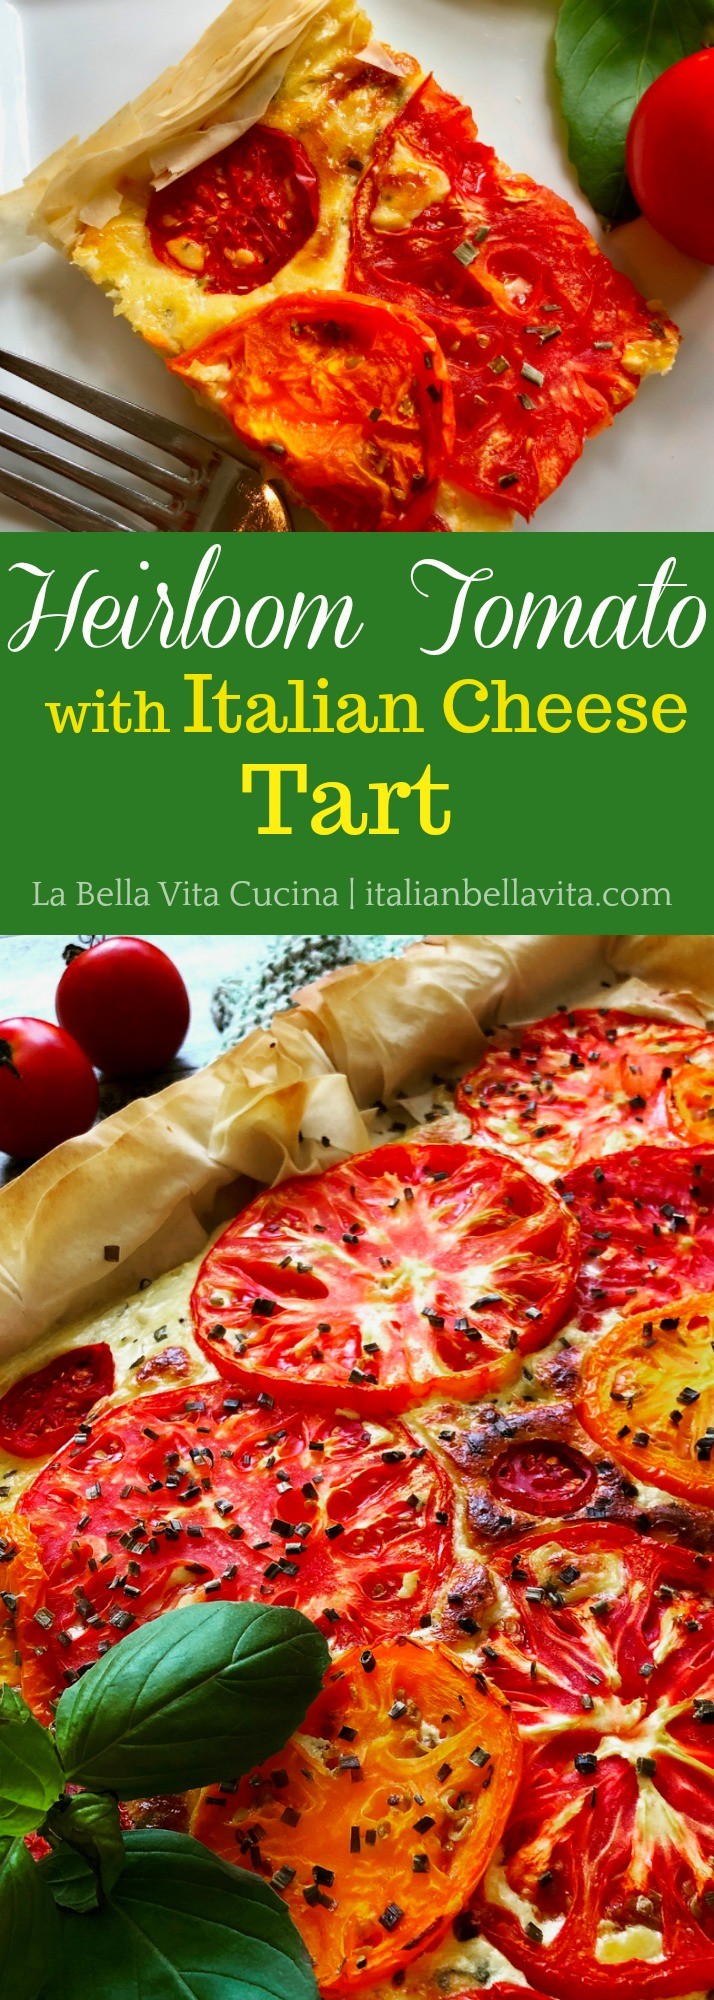
Please share the love and pin this vertical image. We thank you!!!
Tips for Working with Phyllo Dough
Phyllo dough, also spelled ‘fillo’, comes in tissue-thin sheets that are used in Mediterranean cuisine. Due to its thin nature, working with the pre-rolled sheets of phyllo dough can sometimes get a little tricky because phyllo dries out quickly and becomes extremely brittle and fragile when exposed to air. It can also become gummy if thawed incorrectly. Therefore, extra care is needed when handling filo in your baking. Golden brown and extra crispy phyllo dough always gives a rustic touch to tarts, desserts, and appetizers.
I’ll share some of my secrets that I’ve learned from experience that will help you:
Phyllo is stacked and wrapped together into rolls or flat squares and can be found in your food store’s frozen food section. One package contains dozens of paper-thin sheets of phyllo that can be used whole or cut in sizes according to the recipe.
- Thaw the phyllo dough in the unopened package overnight in the refrigerator. If you make the common mistake of defrosting the phyllo at room temperature on the counter, the dough condenses together and becomes gummy. Defrosting in the refrigerator keeps the dough cold, which is the optimal temperature for working with phyllo.
- Do not remove the filo from the plastic wrapping until all of your other ingredients are prepped and ready to go. Phyllo dough dries out extremely fast, so have all of your ingredients, knives, spoons, etc., prepped and ready to use. Some pieces may crack or tear when coming out of the package, and that’s okay. Don’t discard them; instead, place them in the middle of whatever you are preparing, out of sight.
- Always work with your hands dry and use a sharp knife to cut the dough.
- Prepare a surface large enough to use as a workspace (not floured). Place unwrapped phyllo dough on a damp kitchen towel and cover with another damp towel. The towels shouldn’t be completely soaking wet, but just wet enough to give the phyllo dough some moisture. The goal is to keep the dough hydrated and prevent it from drying out. Unroll from the plastic sleeve only when you are ready to use, as it dries out really quickly and will be hard to work with.
- Remember to preheat the oven, so that when done, you are ready to bake right away.
- Phyllo dough sticks to the baking tray very easily when cooked. To prevent the dough from sticking, thoroughly butter the bottom and sides of your baking pan, or use cooking parchment paper, depending on the recipe.
- Melted butter works well to fuse sheets of phyllo together nicely. You can use other oils as well, depending on the recipe.
- Use a pastry brush to brush the phyllo sheets with butter. If some are dry on the edges, use a little bit more butter or oil. Remember to brush the top layer thoroughly with enough butter to become crispier and nicely colored, and to prevent it from getting burned.
- When using phyllo as a top layer of a recipe, remember to score the top of the pastry with a sharp knife to allow the steam to escape while baking.
- If you have any unused phyllo sheets left, wrap them firmly in plastic wrap, place them in the original box, and refrigerate as soon as possible. Phyllo can be kept in an airtight container for several months in the freezer.
This post contains affiliate links which means that a minuscule small commission is paid to us if you make a purchase and there is absolutely no additional cost to you. Please see our Disclosure Policy for information. Thank you for your support!
Heirloom Tomato and Italian Cheese Tart
Ingredients
- 1 box of phyllo dough
- olive oil, approximately 3/4 cup, used to coat layers of phyllo dough
- 8 oz. goat cheese crumbles
- parchment paper
- 5 – 6 assorted heirloom tomatoes in various sizes and colors, sliced thin
- 1-1/2 cup ricotta cheese
- 2 large eggs
- 1 cup mozzarella cheese, grated
- 1/3 cup parmigiana cheese, grated
- 1/3 cup fontina cheese, grated
- 1/4 cup asiago cheese, grated
- 2 cloves garlic, minced
- 1/4 cup onion, diced
- 8 leaves of fresh basil, chopped
- 2 Tbsp. chives, chopped (fresh or dried)
- salt and pepper
Instructions
- Place a sheet of parchment paper in a large baking sheet.
- Layer the phyllo dough one at a time on top of the paper.
- Brush olive oil on top of each layer of phyllo dough.
- On about the 5th or 6th layer of dough, sprinkle half of the goat cheese crumbles.
- Continue to layer and oil the dough.
- On about the 10th or 11th (just guess) layer of the dough, sprinkle the remaining half of the goat cheese sprinkles.
- Finish layering and oiling the remaining layers of phyllo dough.
- In a medium mixing bowl, by hand or hand-held mixer, blend the ricotta with all cheeses, eggs, onion, garlic, basil, chives, and a shake or two or salt, and a large pinch of pepper.
- Spread this cheesy mixture on top of the phyllo dough, leaving about an inch from the edges without the mixture.
- Randomly place the tomatoes on top of the cheesy filling mixture.
- Sprinkle with more chives.
- Place aluminum foil around all edges to prevent burning.
- In a 375 degree oven, bake for 1 hour until golden. If the tomato/filling area has not turned golden, then turn on the oven broiler for 5 – 10 minutes, keeping an eye on the tart so that it does not burn on top.
- Allow to rest for 15 minutes.
- Slice into preferred size pieces. Do not serve with the parchment paper underneath!
- Garnish with fresh basil leaves.
ENJOY!
What are some of your favorite ways to use phyllo?
Looks awesome Roz and I like the tutorial on using phyllo.
Hi Roz
I love your heirloom tomato and Italian cheese tart!
I don’t know how to give the 5 stars but I give it a 5*!!! I do these tarts all the time, but cook at 400 for 45 -hour. No broiler. I add a pepper spice I make up, and the zest of a lemon as well. Thank you for sharing as I enjoyed your version and it inspired me to add more cheeses. .
Hi Therese!
Thank you ever so much for your kind thoughts! I appreciate the 5+ rating and don’t know how to it rate it here as well! I think it’s in the recipe card itself. Thanks also for your tips that I’ll have to incorporate into then next ones!
Happy Summer!
Roz
My heirlooms are just now coming back after having been beaten down by a hailstorm. If I get enough this would be a fabulous dish to make. Love the combination of cheeses you use and such a light crust with the phyllo. Beautiful tart!
This is a delicious Tart Roz!! Funny, I made a pizza similar to your tart and need to post it soon.
Hope you had a wonderful summer. And thank you for your tips about the Phyllo dough – great tips! Miss you Roz!!
Looks delicious, Roz! Very colorful also. Thanks for all the phyllo dough tips. It makes a great crust for your tart, that I want to try. Thanks!
I really do miss having a vegetable garden if only for the wonderful heirloom tomatoes that we grew. Your tart looks terrific and I’m sure was absolutely delicious.
wow What a beautiful tart! I love filo pastry…much healthier and so crunchy too. Thank YOU for sharing those great tips, Roz.